


Curved TVs can offer the viewer a more immersive experience, giving you a wider field of view, more sharpness at the edge of images, a richer contrast, and more depth.
That being said, if your curved screen TV is not positioned correctly, you might be missing out on a lot of these benefits.
One way to make the most of your curved screen is by mounting it on a bracket.
Placing Curved TVs
Difficulty Rating: Fair to moderate
The timescale for the Job : Approximately 2 hours
Preparation for Placing Curved TVs
If you are planning to mount a curved TV, you need to decide where you want it to be placed in your room. Ideally, this should be close to a power source – this will stop you from having to tail wires across the room or save time and hassle trying to hide them.
You will want to avoid placing it too high. Your TV should be in a place where you don’t have to strain your neck or eyes to see it.
To find the perfect distance, take the diagonal width of the TV, and multiply it by three.
Finally, decide whether you want the TV to be a focal point in your room or if you want to subtly integrate it into the decor by hiding it or matching it to the aesthetic of the room.
Types of TV Wall Mounts
You will also have to decide on what type of wall mount you want for your TV. There are a number of styles on the market, so doing a bit of research beforehand will help you make your decision.
Low-Profile / Fixed Wall Bracket
The flat to wall bracket is the most common option suited for those who want their TV flat against the wall. Curved TV screens won’t allow a TV to be flush, but it is still a good option for those that want their TV’s to be unobtrusive.
Ultra-Thin Wall Bracket
The ultra-thin wall bracket works in the same way that fixed or low-profile options work. However, they allow the TV to sit much closer to the wall. This option should only be considered by those with partition walls that will hide cables within them.
Moveable TV Wall Mount
Attaching a TV to the wall can take away some freedom and the flexibility of being able to move it. One way to resolve that issue is by installing a moveable TV mount. There are various options on the market to choose from.
Swivel Bracket
A swivel bracket works like a low profile wall mount but has an extended arm to move the TV horizontally. This is ideal for rooms that might have different viewing angles.
Tilt Bracket
If you are struggling for space or don’t have many options for where to mount your TV and have to opt for a high position on your wall, a tilt bracket can be helpful.
A tilting bracket allows you to tilt the TV downwards to enhance your viewing position.
Full-Motion Bracket
Full motion or multi-position wall brackets give you the most flexibility. The extending arm allows you to tilt or swivel your TV into the ideal position.
The Tools You Will Need for Placing Curved TVs
To be able to mount your TV, you will need the correct tools. Here’s a list of what you’ll need, and the bracket and accessories that come with it.
- Drill
- Pencil
- Measuring tape
- Screwdriver
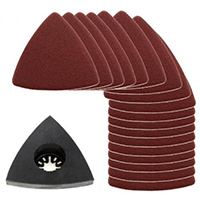
Now that you have the tools needed, you will need to open the bracket and accessories to ensure that all the parts are in working order. Set them out in order to make it easier to find what you are looking for when carrying out the job.
Now that you have the tools and parts set up follow these steps to place your mounted curved TV.
Step 1
The first step is to mount the wall mount. You should hold the mount against the wall and use your pencil to mark where you want to install the screws for concrete walls.
Then you can drill 10mm diameter holes to a depth of 60mm before installing the screw anchors and securing the wall mount using the screws and washers provided with the bracket. You can then attach the plastic cover over the screws on the wall plate to make it neater.
For wood stud walls, the steps are relatively similar. First, identify where the studs are and mark where you will install the screws. Drill the four holes with a 5mm diameter and 60mm depth. You will then be able to secure the wall mount with the screws and washers provided.
Step 2
You will then attach the mounting plates to the VESA holes on the back of your TV.
Step 3
The next step is to hang the Tv to the wall plate. Slide the mounting rails onto the mounting plate, then clip the arms into the gear. The TV should then be secured, and you will be able to stick the magnetic pendants onto the bracket.
Step 4
It is unlikely that your bracket will automatically be in a favourable position. To alter the tilt you will be able to loosen, or tighten the screw nuts on the TV plate.
Step 5
To make sure the TV stays tidy, you should clip the cable management cover to the mount. The cables can be fed under the cover to keep them in place.
Things to Remember When Placing a Curved TV
While most TVs will not require a unique mount, you should always check to see if your TV model is compatible with the mount.
You will also be able to check the VESA either in the manual or by looking at the back of your TV. The VESA is the distance between the mounting holes on the back of the TV. It’s measured in millimeters, and is shown as the horizontal x vertical distance.